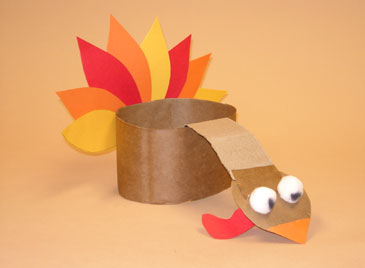
Turkey Hat
This Thanksgiving project is a great way to keep your child busy while you're cooking the bird.
Updated: December 1, 2022
Turkey Hat

Age: Preschool through elementary
Time: An hour or more
Type of activity: Arts-and-crafts
Involve your child in the Thanksgiving festivities -- turn her into a turkey! This project is a great way to keep her busy while you're cooking the real bird.
Materials:
- Scissors
- Brown paper bag
- Cardboard (cereal or tissue box)
- Glue
- Orange, red, and yellow construction paper
- 2 small white pom-poms or cotton balls
- Black marker
Directions:
- Cut a circle out of the brown paper bag that is 3 to 4 inches in diameter. This will be the turkeys' head.
- Cut a 3-inch-wide band out of the paper bag, long enough to fit around your child's head.
- Cut a 5-inch-long and 2-inch-wide strip out of the cardboard. This will be the turkey's neck.
- Fold the neck three times, like an accordion and glue one end of the neck to the back of the paper circle.
- Cut a small triangle from the orange construction paper. This will be the turkey's beak.
- Cut out a rounded L-shape from the red construction paper. This will be the turkey's wattle.
- Draw a black circle on each pom-pom with the marker. These are the turkey's eyes.
- Glue the eyes, wattle, and beak to the turkey's head.
- Wrap the headband around your child's head and mark where the ends overlap. Glue those ends together.
- Glue the loose end of the neck to the center of the headband.
- Draw and cut different colored feathers from the orange, red, and yellow construction paper. The amount you'll need will depend on how big your child's hat is. Start with 15 feathers.
- Glue the feathers around the headband, overlapping in some places.
Now your child has a terrific turkey hat!

